Normalize Your MP3 Files For Better Audio Quality Experience
After you finally create your online radio station and you start to stream your music or audio the work does not end there. Another part of the job is the quality of the audio, and I am not just talking about each MP3 file having to sound good. You want all of the files to be of the same quality and sound the same. Sometimes you will have some files with different volume levels and that is why you listen to one song now and it sounds fine but the next one is too loud or too low. This is a very annoying experience for your listeners and could cost you the loss of listeners. This is what you will need to do for a better audio quality.
What to do to solve this problem?
Something you can do is Normalize your MP3 files. Every MP3 file has its own characteristics. Different encoders are used by people on music from all kinds of sources, resulting in wildly varying volumes from song to song. For a smooth listening experience that will let you hear an entire playlist without adjusting your volume knob, you should normalize your MP3s.
Normalize is an audio term meaning just what it sounds like. Normalizing software looks at an audio waveform and juices it up to eliminate volume discrepancies. But you don’t need to be a recording engineer to normalize your MP3 files; in fact, it’s quite easy, whether you want to do so as you create a new file or work on a previously encoded file.
This tutorial will show you how to “Normalize existing MP3s.”
Another thing to consider is if you are using software to stream like Winamp, Sam Broadcaster, Virtual DJ, Traktor Pro, etc. you can keep a high bitrate when you encode because the software will stream the audio to the right bitrate you set to stream. (for example to 128kbps, 96kbps, 64kbps, 32kbps, etc.) But if you will upload your MP3 files to your AutoDJ this is a good opportunity to re-encode to the bitrate you plan to stream and also will help you to save AutoDJ space. See our article How To Maximize Your AutoDJ’s Space Re-Encoding Your MP3 Files
However, MP3Gain does not change the bitrate of your MP3 files when re-encoding existing audio files, which is why we recommend it here.
Before you start, you’ll need:
MP3Gain (to normalize existing MP3s (PC only))
Normalize existing MP3s with MP3Gain:
- Install MP3Gain (PC only).
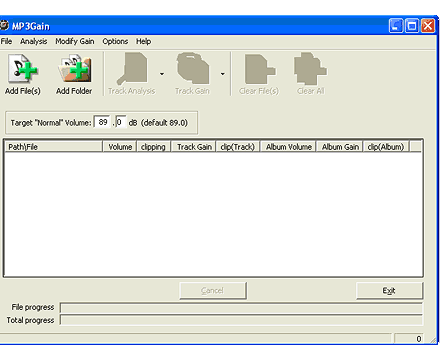
- Launch MP3Gain.
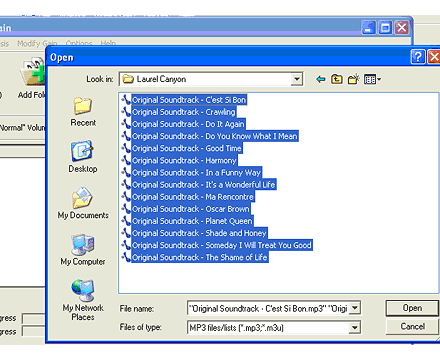
- Select the MP3 files to normalize. Click the Add File(s) icon to open the Add Files window. Select the MP3 files you wish to normalize and click Open. Repeat the process to select files from different directories.
- Set the target volume level. MP3Gain’s Target “Normal” Volume field determines the target volume for your MP3 files. The default setting of 89.0dB is a good starting point. You can increase or decrease the target volume level later if desired.
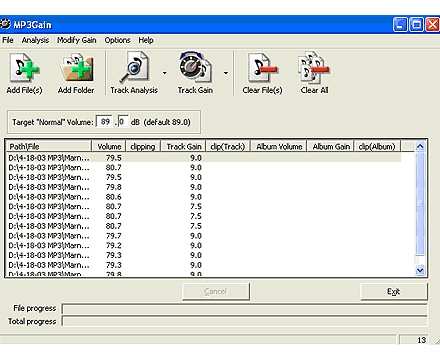
- Analyze your MP3 files. Click the Track Analysis icon and wait while the software analyzes the volume of your MP3 files. You can skip this step if you’re not interested in knowing the current volume levels of the files.
- Normalize your MP3 files. Click the Track Gain icon and wait while the software normalizes the volume of your MP3 files.
- Listen to your MP3 files. If the files are too quiet or too loud, adjust the setting in the Target “Normal” Volume field and click Track Gain again.
If you like this article or find it useful please share it.


